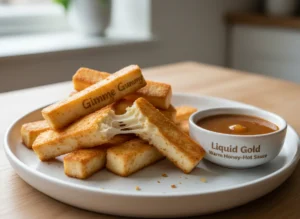
The first sensory hit is the sound—a sharp, resonant crack as your teeth break through a Panko-armored surface that has been toasted to a crystalline finish by 400°F convection. But the real 2026 victory is the “Gimme Gummy” payload: a succulent, velvety reservoir of white meat that offers a bouncy, tactile resistance as you bite through the rigid ridges of the charred exterior. This isn’t the limp, oil-saturated, or grey chicken of the past. It’s a sensory event—a collision of an aggressively bubbled, salt-blasted exterior and a sweet, “liquid gold” heart that has been pressure-roasted inside its own convection-locked cage.
Welcome to The Crispy Basket, where we’ve officially retired the “Bland Breast.” Making tenders in an oven is a game of “The Moisture Leak,” where the juices escape and ruin the breading before it ever gets a sear. Our air fryer method solves the thermodynamics of the strip by leveraging high-velocity convection to “flash-set” the armor from every angle simultaneously, locking the moisture into the meat while turning the surface into a savory glass shard.
The Strategy: Why This Works
The problem with traditional chicken tenders is “Internal Steam Saturation.” In a slow oven, the steam from the meat is trapped against the breading, leading to a gummy interface. We fix this using the “Tornado Effect” of the air fryer combined with our signature “Starch-Seize” protocol.
The air fryer’s fan dehydrates the surface starch almost instantly, creating thousands of microscopic “shatter-points.” By using a specific “Cornstarch-Egg-Panko” armor, we create a rigid, shatter-crisp barrier. This happens so fast that the internal moisture is trapped, essentially “pressure-steaming” the chicken from the inside out. This transforms the core into a “Gimme Gummy” bouncy state before the exterior can lose its snap. The result is a tender that is 100% crunch and 100% bounce, achieving a mahogany-gold finish in exactly 15 minutes.
Ingredient Deep-Dive: The Texture Profile
| Ingredient | Role in Texture | The “The Crispy Basket” Standard |
| Chicken Breast | The “Gimme Gummy” Foundation | Sliced into uniform 1-inch strips for a “bouncy” structural set. |
| Panko Breadcrumbs | The “Shatter-Crisp” Shell | Large, jagged flakes provide the best surface area for the “Tornado Effect.” |
| Cornstarch | The “Starch-Seize” Glue | Creates a microscopic crystalline veil that anchors the armor. |
| Garlic & Onion Powder | Aromatic Snap | Essential for that deep, toasted savory profile. |
| Avocado Oil Spray | Heat Conduction | A microscopic mist triggers the “Flash-Sear” on the Panko. |
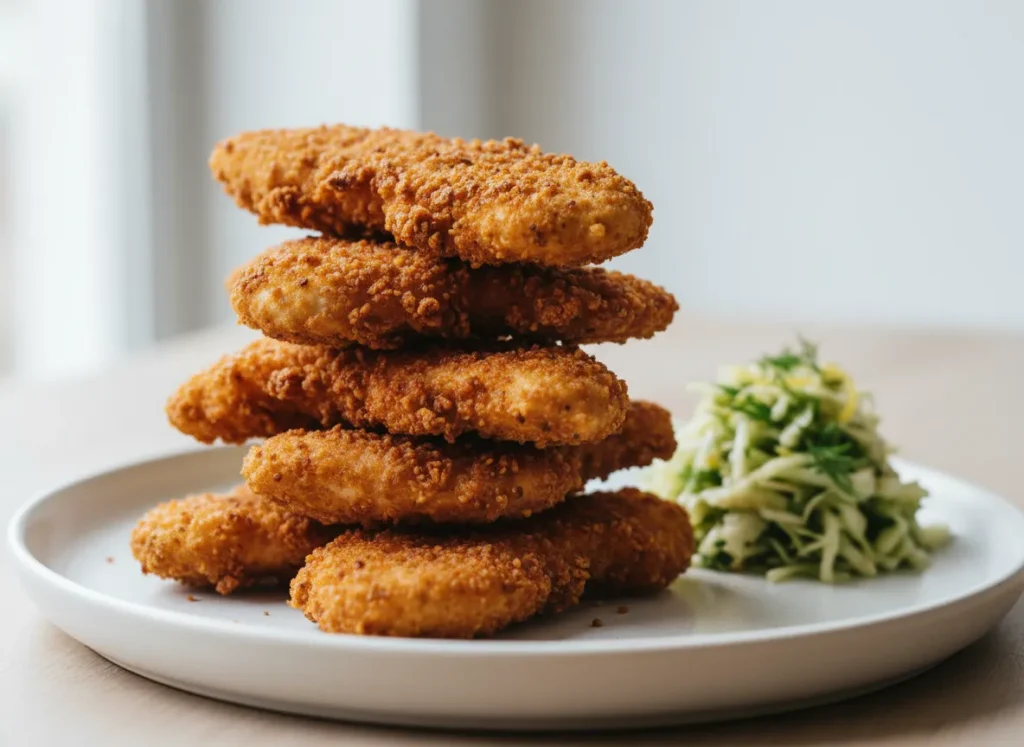
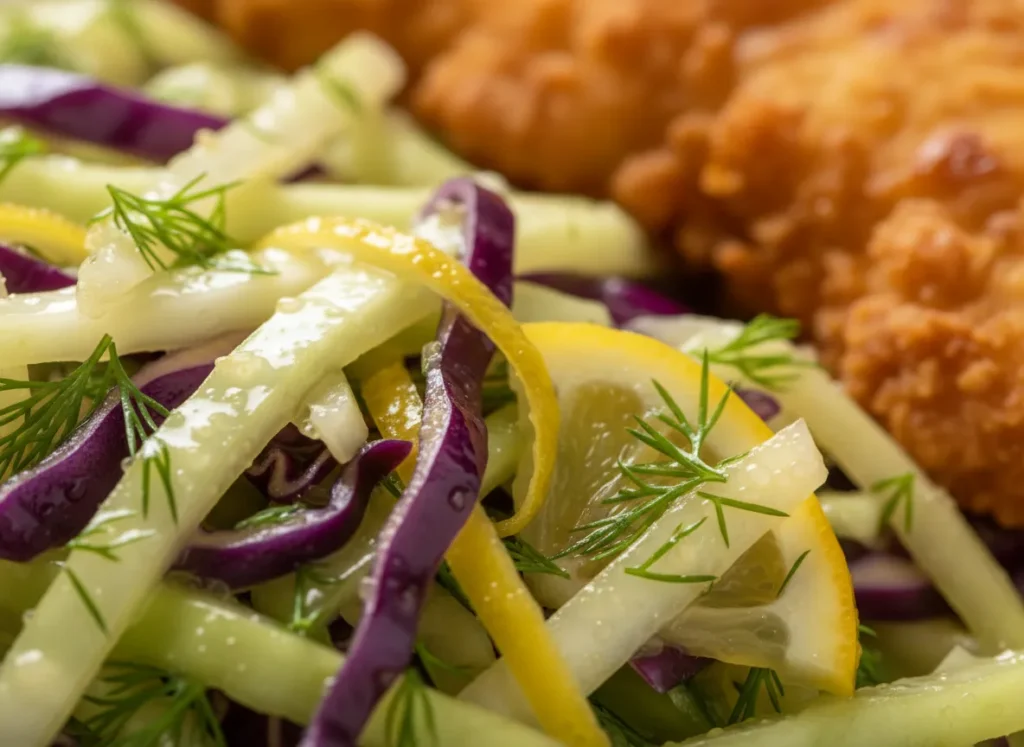
- The “Cabbage Crush” Pairing (The Lemon-Dill Variant): We serve these golden strips with a side of Fermented Lemon-Dill Cabbage Slaw. The probiotic-rich, acidic “snap” of the fermented cabbage mixed with fresh dill brightens the rich, savory chicken and hits the 2026 trend for functional, gut-healthy meal prep.
The Pro-Tips Vault: Secrets for Success
- The “Bone-Dry” Mandate: This is non-negotiable. You must pat the chicken strips with paper towels until they are virtually tacky. Moisture on the surface will turn the starch into a “Gummy Slump” instead of a “Shatter-Set.”
- The “Starch-Prime” Technique: Roll the dried chicken in cornstarch before the egg wash. This acts as a “primer” that prevents the breading from sliding off in the high-velocity wind.
- The “Double-Press” Technique: When breading, press the Panko into the strips with firm pressure. You want a jagged, thick armor that can withstand the 400°F convection.
- The “No-Touch” Spacing: If the tenders overlap, they will steam each other and lose their structural integrity. For maximum ASMR crunch, lay them in a single, non-touching layer with 360-degree airflow.
- The “High-Heat” Blast: Don’t go low and slow. We want 400°F (200°C) to set the starch and the “shatter-crust” instantly.
Step-by-Step Narrative: From Prep to Gold
We start with the “Surgery.” Slice your chicken into precise, uniform strips and execute the “Bone-Dry” mandate. Execute the “Starch-Prime” technique, then dip in seasoned egg wash and press into the Panko “snow” with firm aggression.
When those strips hit the preheated 400°F basket, you’ll hear a sharp, aggressive sizzle. That is the sound of the starch “shatter-setting.” Eight minutes in, give the basket a gentle shake. You’ll see the edges turning a deep, toasted mahogany.
For the final seven minutes, the smell of toasted garlic and savory poultry will fill your home. When you pull the basket out, the tenders should be rigid and “clink” when you toss them in a container. Serve immediately or pack them away with our Lemon-Dill Cabbage Crush for a 2026-style meal-prep masterpiece.