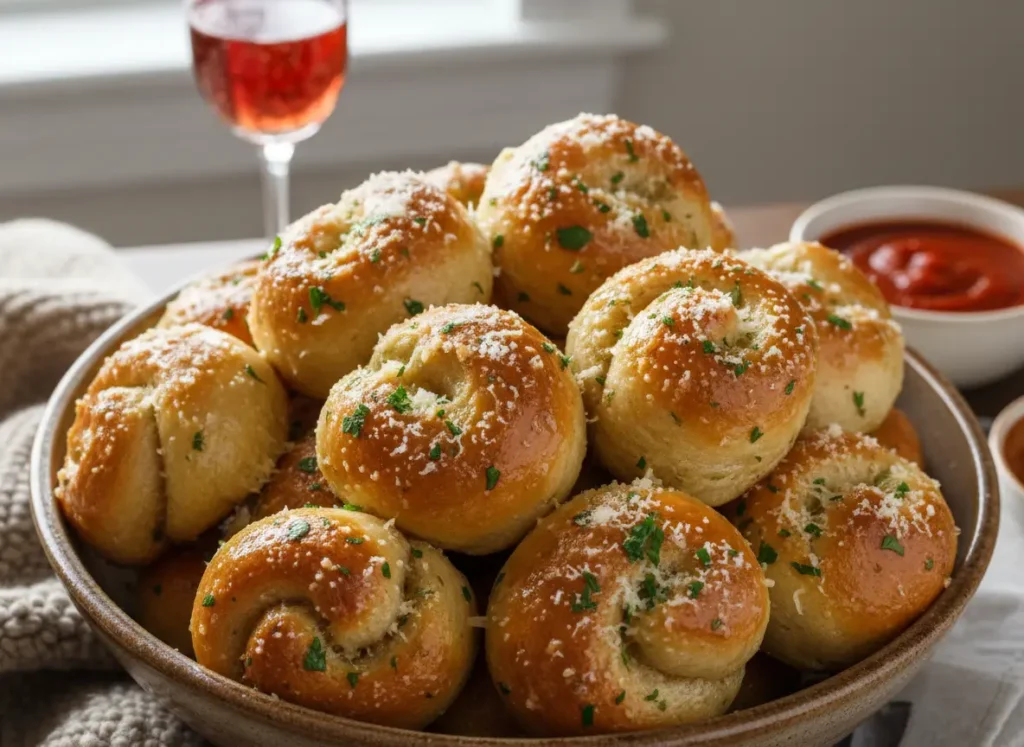
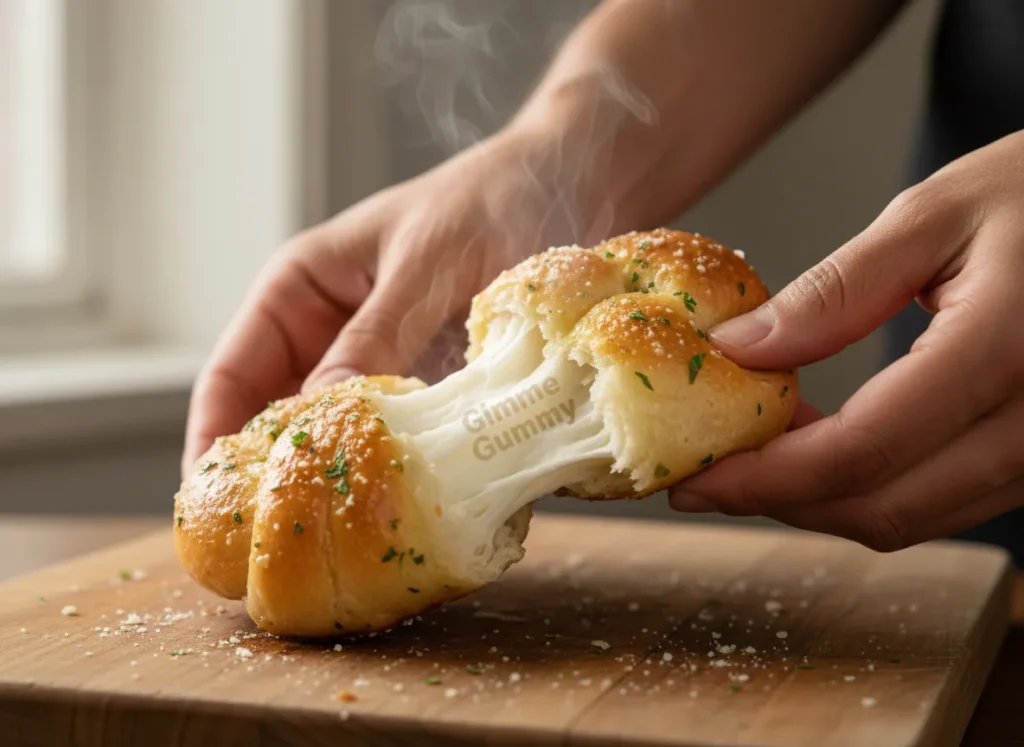
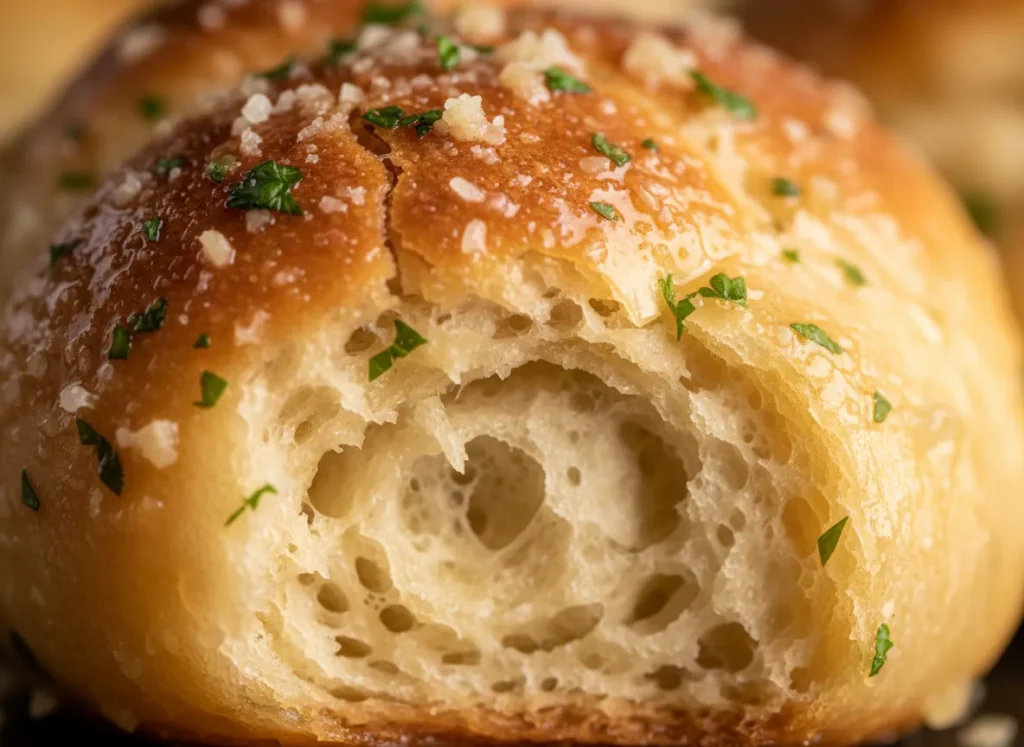
The smell hits you first—an aggressive, intoxicating wave of roasted garlic, toasted butter, and warm yeast that fills the kitchen. Then comes the sound: a delicate, crystalline crack as you pull a knot apart, breaking the golden, parsley-flecked crust to reveal a steaming, soft, and impossibly “Gimme Gummy” interior. This isn’t the dense, chewy lump of dough you get from a chain delivery place. It’s a maximalist textural experience—a perfect balance of airy puff and satisfying crunch that turns a $3 tube of pizza dough into a gourmet appetizer.
The problem with homemade garlic knots is “The Oven Dry-Out.” To get a crispy exterior in a standard oven, you have to bake them so long that the inside turns into bread jerky. We are here to fix the physics of the knot. By leveraging the high-velocity convection of the air fryer, we are “flash-puffing” the dough. The intense heat sets the exterior crust in minutes, trapping the internal steam to create a bouncy, pillowy structure before it has a chance to dry out. This is 15-minute carb magic.
Why This Works
The success of this recipe lies in Rapid Steam Expansion and Surface Maillard Reaction. Store-bought pizza dough is designed to rise quickly. In a standard oven, the heat transfer is slow.
In your air fryer, the “Tornado Effect” of the fan hits the dough with intense heat from all sides. This causes the water inside the dough to turn into steam instantly, expanding the air pockets and creating that signature “bouncy” chew. Simultaneously, the surface rapidly dehydrates and browns, creating a thin, rigid “shatter-crust.” We also utilize the “Post-Bake Butter Bath”: tossing the cooked knots in the garlic butter after they come out. This ensures the garlic stays pungent and fresh, rather than burning and turning bitter during the high-heat bake.
Ingredient Deep-Dive
- The Dough (Refrigerated Pizza Dough): The ultimate budget-friendly hack. A standard tube yields about 10–12 maximalist knots.
- Substitution: For a 2026 “Wilderkind” sourdough twist, use discard sourdough starter mixed with flour for a tangy, fermented flavor profile.
- The Fat (Salted Butter): We want the rich, savory punch of salted butter for the bath. It’s the vehicle for all the flavor.
- The Flavor Bomb (Fresh Garlic & Parsley): Do not use garlic powder here! You need the sticky, pungent oils of fresh minced garlic for the true maximalist experience. Fresh parsley adds a bright, grassy contrast.
- The Finish (Grated Parmesan): A dusting of cheese at the very end adds a salty, savory umami layer that clings to the butter.
Secrets for Success (The Pro-Tips Vault)
- The “Loose-Tie” Law: Do not strangle your dough! When tying the knots, keep them loose. The dough needs room to expand and “puff.” A tight knot will result in a dense, uncooked center.
- The “Butter-Bath” Mandate: Don’t just brush the butter on; toss them in a bowl. You want every nook, cranny, and fold of that knot to be coated in the garlic-herb mixture.
- The “No-Crowd” Strategy: Air needs to circulate around each knot to crisp the sides. If they are touching, you’ll get “gummy sidewalls.” Cook in two batches if necessary.
- The Pre-Heat Oil Spray: Give the raw knots a light spray of olive oil before they go in. This helps initiate the browning process before the butter bath.
- The “Cool-Down” Chew: Let them rest for 2 minutes after the butter toss. This allows the crust to absorb some of the butter and the interior structure to set into its final “bouncy” state.
Step-by-Step Narrative
We start with the “Dough Prep.” Pop that tube and unroll the dough on a cutting board. Slice it into 12 equal strips. Now, the “Tie.” Take a strip and gently tie it into a simple over-under knot, tucking the ends underneath. Remember: keep it loose! They should look like little doughy pillows.
When they hit the preheated 380°F basket, give them a quick oil spritz. You’ll hear a faint sizzle. Six minutes in, flip them over. You’ll see them puffing up significantly, turning a pale golden color. While they finish, melt your butter in a large bowl and stir in the minced garlic and parsley. The smell will be incredible. When you pull the basket out, the knots should be rigid and golden-brown. Dump them immediately into the butter bath and toss violently until coated. Dust with parmesan and serve while steaming.
Variations & Pairings
- The “Cabbage Crush” Dunk: Serve these alongside a bowl of Air Fryer Roasted Cabbage Soup for a hearty, maximalist winter meal.
- The “Sweet Heat” Knot: Add a tablespoon of Hot Honey to your garlic butter mixture for a 2026 trending spicy-sweet kick.
- The Everything Bagel Knot: Add Everything Bagel Seasoning to the butter bath for a salty, seedy crunch.
- Drink Pairing: A Crisp Italian Pilsner or a Sparkling Red Wine (Lambrusco) to cut through the rich garlic butter.
Storage & Reheating
Garlic knots are best eaten fresh, but they store well. To Reheat: Put them back in the air fryer at 350°F for 2–3 minutes. They will “re-shatter” and the inside will soften up perfectly. Avoid the microwave, which makes them chewy tough.
FAQ Section
- Why are my knots doughy inside? You likely tied them too tightly or didn’t cook them long enough. Try a looser tie and add 2 minutes to the cook time.
- Can I use homemade dough? Absolutely! Just make sure it’s risen once before shaping and cooking.
- Is this budget-friendly? Yes. A tube of dough and a stick of butter is one of the cheapest appetizers you can make.
- Why did my garlic burn? You added the garlic butter before cooking. Remember the “Post-Bake Butter Bath” rule!
- Can I make them vegan? Yes! Use a vegan pizza dough and high-quality vegan butter for the bath.
Conclusion
These Air Fryer Garlic Knots are the ultimate proof that you don’t need a pizza oven to create a pizzeria-quality appetizer. They are loud, they are buttery, and they are unapologetically maximalist. If you make these for your next movie night, be prepared for them to vanish before the opening credits. Leave a comment below: are you team “Extra Garlic” or “Extra Parm”?